Wall Reinforcement 1.1
Following the last posts about the workshop refurbishment to build a 130m2 green roof, this new article feature focuses on a wall reinforcement work. The renovation involves a serie of constraints we need to deal with in order to carry the static load of the future vegetal cover as well as the dynamic load of the people in the garden. Among those ones, reusing the existing stone walls required to reinforce in particular one of them to balance its insufficient thickness. The following sections will introduce you to this process from few theoretical inputs, equipment and safety requirements to a step-by-step practical guideline.
Reinforcing walls?

Our exploration on the green roof technologies set up our choice to investigate the construction of a semi-intensive system offering the possibility to cultivate food. This +/- 50cm cover (composed of 40cm of earth at the center) impacts the renovation process by its load of 600kg/m2, including the dynamic load. To build this green roof, a new wooden structure will lay directly on the existing structural stone walls. Nevertheless, one of the wall seemed too thin to carry the weight of the green roof structure. To reinforce the loading capacities of this wall and as advised by our engineer, we decided to reinforce it by adding a wooden “skeleton”. This superstructure avoids the construction of a new wall by improving the structural characteristics of the existing one.
This wooden frame screwed on both side of the wall is composed by a serie of 2m distanced wooden columns laying on granite foundations. As explained in our previous article, using a granite foundation type follows our environmental care by using materials locally sourced. With this solution, we also pursue our objective of not using concrete in the project. Finally, the whole piece will help carrying the roof load applied on the wall rim joist fixed on top of each stone wall.
Phases and tools needed
The plan for the reinforcement of the wall is structured along two main phases:
Preparatory phase – Foundation construction:
- Electric hammer, to break through the floor;
- Shovel, to excavate the earth;
- Chisel and hammer, to break and model the stones;
- Mortar mixer, trowels and wooden floats to fill the foundation with lime mortar;
- Level;
Refurbishing phase – Placement of the wood beams structure:
- SDS drill for concrete 13mm;
- Drill for wood 13mm;
- Level, to place properly the reinforcement beams;
- Circular saw;
- Grinder, to cut the threaded rod;
Throughout each phase, we remind you that it’s important to protect yourself using appropriate safety equipment.
For this, you will need:
- Scaffoldings;
- Helmets;
- Protective goggles;
- Appropriate protective gloves;
- Security shoes;
- Reusable dust masks;
THE REINFORCEMENT:
A step by step guide
1. Building granite foundations

The granite foundation is used as a base for the reinforcement columns as recommended by our engineer. Combining both theoretical researches and practical experiments, we found our way to build it.
This foundation requires a 40/40/25 cm depth ground hole. This hole will then have to be filled with stones to serve as a footing for the columns. Since the layout will define the strength of the future foundation, it is important to properly select and arrange those stones in the steadiest way possible. You can achieve this by preparing in advances the main stones and making sure they fit within the shape of the ground hole, layer by layer from the bottom to the top.
As our source of materials (coming from the deconstruction) is not standard, we applied a common way to build the foundation with three or four layers of stones.


- The first layer: follows perfectly the edges of the ground.
- The second layer: covers a maximum of stones from the first layer.
- And so on, layer by layer, until the last one made with one big stone covers all the smallest stones from the previous layer.
This last biggest stone on the last layer has the role of carrying the reinforcement column. Hence, it should be as flat as possible, and its size should match the bearing surface of the column (or bigger).
When all the stones are well selected and shaped, the whole foundation can be set and meticulously filled with lime mortar and smallest stones.
2. Setting the roof slope

The whole wooden reinforcement structure has to follow the slope of the roof. Therefore, all columns will have a different height. To figure out the specific height of each column and to properly prepare their placement, we used two different reference lines primarily drawn on the walls with a chalk line reel:
- An horizontal reference line +/- 1m above the ground (because the ground is not flat enough to take it as a reference)
- A 5% slope reference line that indicates the roof inclination
These two lines are fundamental in the building process at different steps of the work by allowing us to always keep the precise measures for building the roof.
3. Defining the good anchor

All the wooden beams have to be firmly attached to the stone wall. Following the engineer´s recommendations, we anchored each of them:
- every 40cm in the wall, and always on a stone.
> Measure and plan the position of the holes to make sure that the bolts are secured into the stones and not the joints. Otherwise, it might decline the structural capacity of the wall. - with the holes alternately arranged from the upper and lower part of the wooden beam.
>Make sure that they are not too close to the edges (minimum 1/3 of the width of the beam) not to weaken the beam.
To help with the choice of the proper position of the anchors on the beams, we created a mold of wood. Once the placement of the anchors are defined, the points can be reported on the beam and the holes drilled.
4. Preparing the wooden beams

Each beam has been previously cut to its specific height thanks to the 5% slope reference line. After defining the anchors positions, the preparation of the wood follows the fundamental requirements of a building; fire and humidity resistance.
- Fire resistance: borax and linseed oil experimental technique [1].
To protect the wood from the fire, we applied one layer of a borax preparation. Once dried, we applied a linseed oil the protect it from bugs. This experimental protection technique will be updated in a following article. - Waterproof membrane:
To avoid the absorption of the wall’s humidity, a breathable waterproof membrane on the back part of the beam was fixed.
Once cut, drilled, painted and protected, the beams are set vertically on the wall. In our case, we decided to keep a margin error of maximum 3mm.
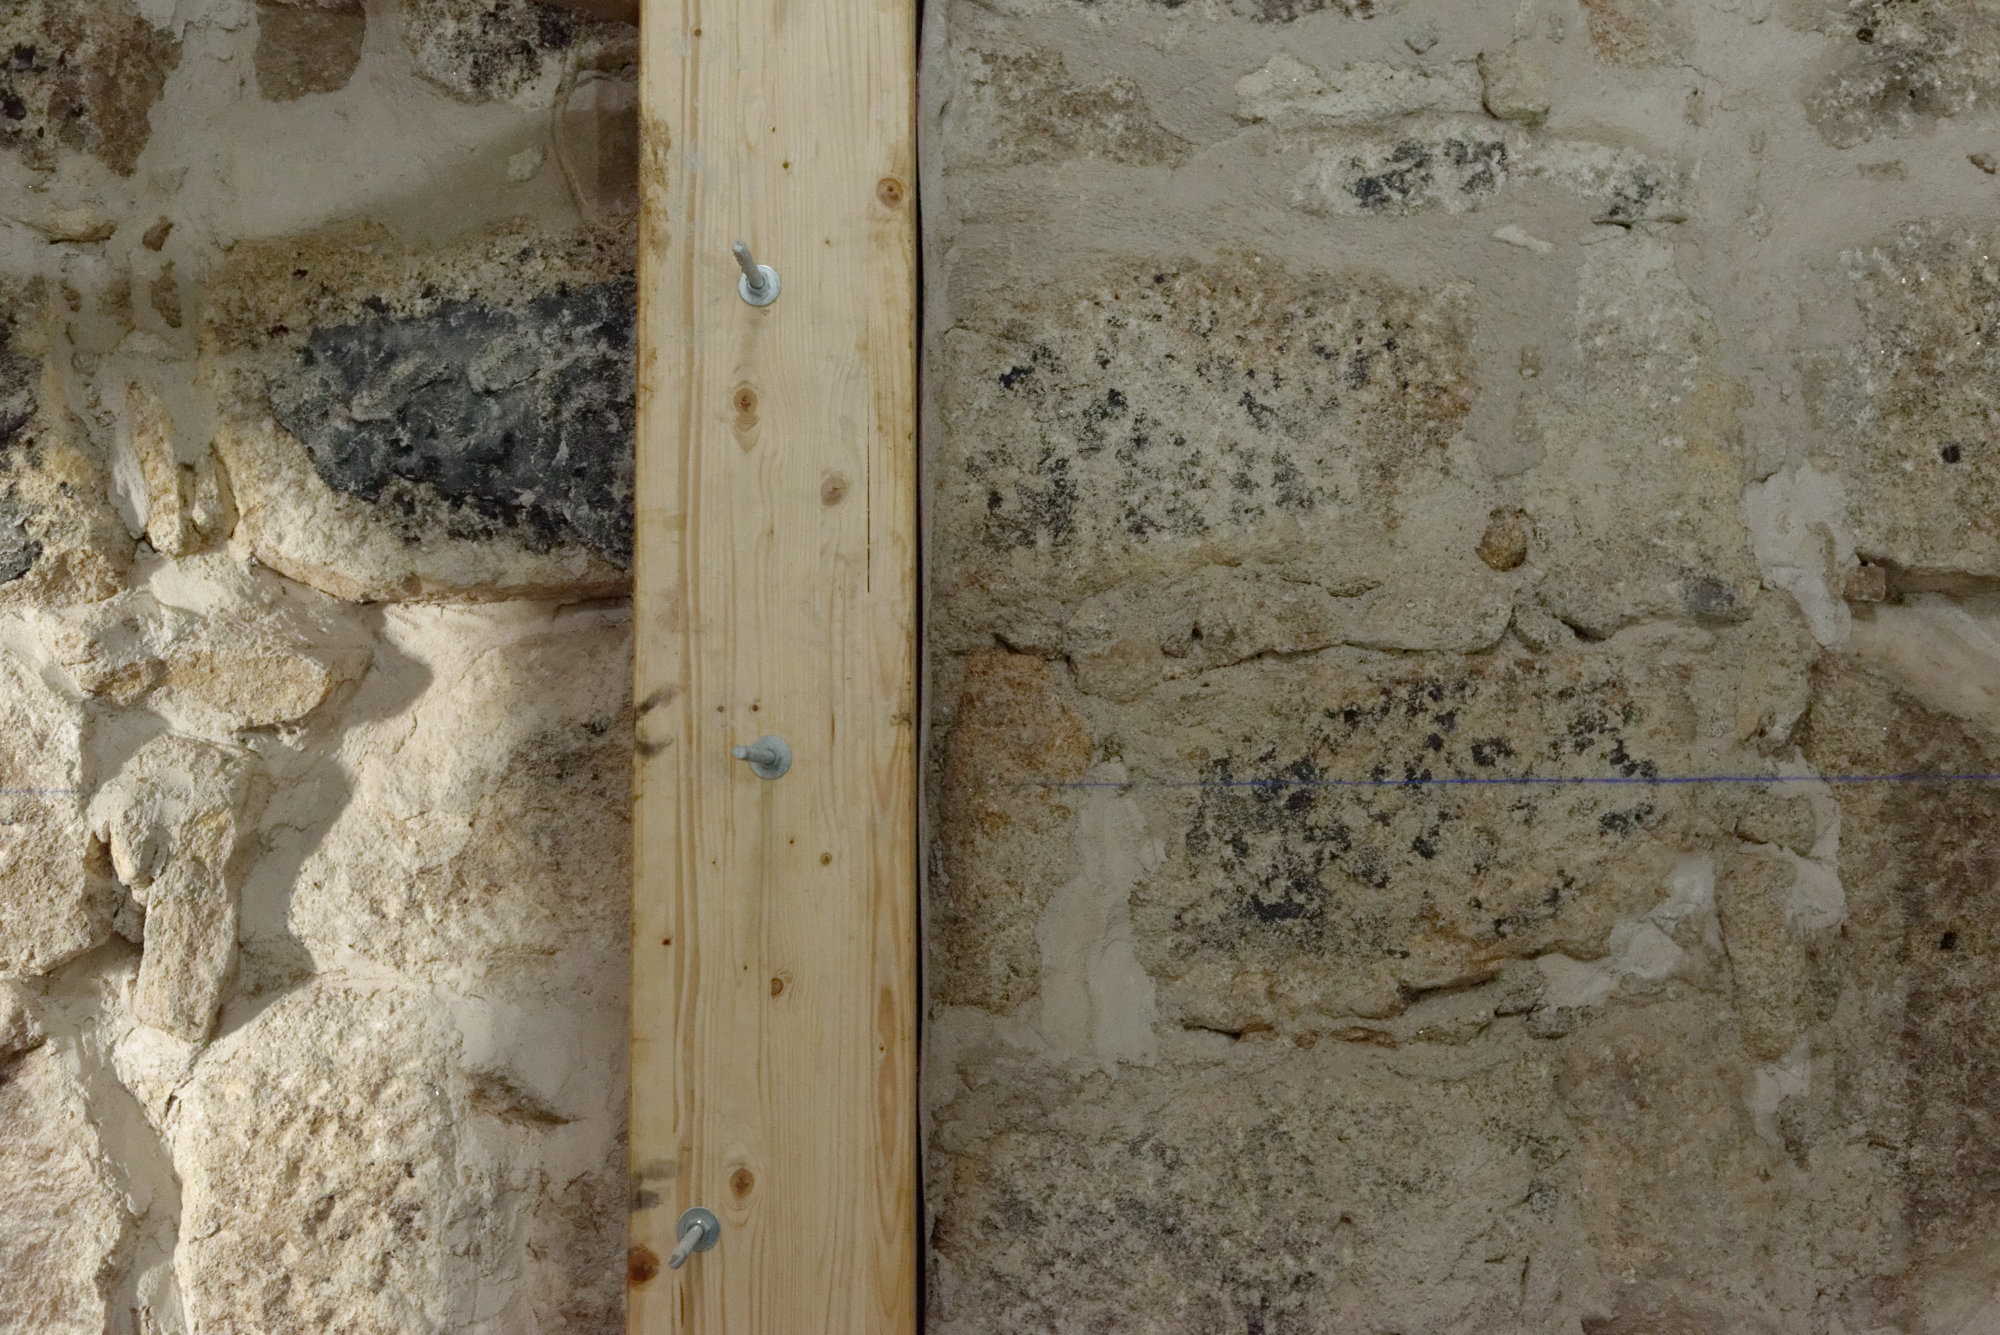
5. Fixing the columns to the wall


After double checking the precision of your work and the placement of the columns, they can be attached to the wall.
- The columns are directly drilled to the wall as tightly as possible through their anchored holes. This technique helped keep the straightness of the hole as much as possible and involved the participation of two people.
- To fix the whole structure, threaded rods are inserted within the columns and throughout the wall. As there is a wooden beam in both sides of the wall, the most difficult step is to match the holes together when inserting the threaded rods into the structure.
- The final result has to be leveled while placing and tightening the washers and the nuts.
6. Filling the gap, a last lime mortar touch
When the columns are placed on both sides of the wall and screwed together, the last step is to properly link them to the wall.
Because of the irregular form of a granite wall, the columns are not touching the wall all along. To fill this gap, it’s time to go back to our first love and never ending work: lime mortar and granite stones work. This last step will connect perfectly the column to the wall. The better the assembly, the better the resistance to finally avoid the inflation of the wall from the pressure of the roof load.
All this process of reinforcing the structure of the wall helped us improve and increase our technics of wood work with, thankfully, feet on earth. This first experiment gave us all the right steps to go further on the construction process to install the wall rim joist on the walls. With another noticeable difference, the necessity of securing even more the beams on the wall once in position to verify the precision of the work. A nice wall rim joist to carry the main beams of the upcoming green roof is the latest result of our self-building green roof experiment!

Source:
[1] Cirad. “Borat et huiles végetales, des produits prometteurs pour protéger le bois” [Online] Available at:https://www.cirad.fr/publications-ressources/science-pour-tous/rapports-annuels/rapport-annuel-le-cirad-en-2007/preserver/borates-et-huiles-vegetales-des-produits-prometteurs-pour-proteger-le-bois (Last accessed: May 2019).
Cirad – Agritrop. “Development of boron/linseed oil combined treatment as a low-toxic wood protection. Evaluation of boron fixation and resistance to termites according to Japanese and European standards” [Online] Available at: http://agritrop.cirad.fr/561809/ (Last accessed: May 2019).
Florent Lyon, Marie-France Thevenon, Won-Joung Hwang, Yuji Imamura, Joseph Gril, et al.. “Effect of an oil heat treatment on the leachability and biological resistance of boric acid impregnated wood. Annals of Forest Science”, Springer Verlag/EDP Sciences, 2007, 64 (6), pp.673-678. ffhal-00884120. [Online] Avalaible at: https://hal.archives-ouvertes.fr/hal-00884120/document (Last accessed: May 2019).
González-Laredo, R.F., M. Rosales-Castro, N.E. Rocha-Guzmán, J.A. Gallegos-Infante, M.R. Moreno-Jiménez and J.J. Karchesy. 2015. “Wood preservation using natural products. Madera y Bosques 21”(Núm. esp.):63-76. [Online] Available at: http://www.redalyc.org/pdf/617/61743003005.pdf (Last accessed: May 2019).
König, H., Weissenfeld, P., “Entretien écologique du bois”, ed.La plage.
